Perspective Warping An Image
Perspective warping is a technique that lets you manipulate an image’s perspective. You can also warp a part of an image. It can correct distortions, align objects, change viewpoints, and create realistic composites. In this article, we will explore perspective warping. We will discuss how it works and provide some examples of its applications.
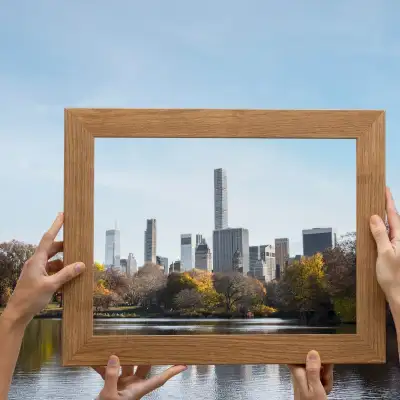
What is perspective warping?
Perspective is the way we perceive the relative size, shape, and position of objects in a scene. It depends on the distance and angle of the camera from the objects. When we take a photo of a scene, the perspective of the image may not match the perspective of our eyes. This can result in perspective distortion. Distortion is the warping or transformation of an object and its surroundings. It differs significantly from how things look with a normal focal length.
Perspective warping is the process of adjusting an image’s perspective or a part of it. Using a grid of control points accomplishes this. You can divide the grid into one or more planes. Planes are flat surfaces that represent the orientation of the objects in the image. By moving and rotating the control points, you can change the shape and position of the planes. This changes the perspective of the image.
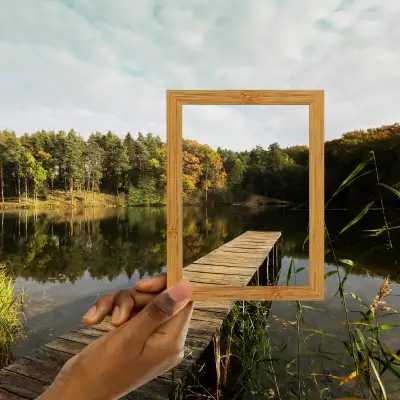
How does perspective warping work?
Various software applications can accomplish perspective warping. For example, Adobe Photoshop has a tool dedicated to this purpose. The basic steps of perspective warping are as follows.
Open and prepare the image. Select the layer you want to adjust and make a copy of it. If you want to warp only a part of the image, make a selection around it and create a mask.
Open the perspective warp tool. Choose Edit > Perspective Warp from the top menu. You will see a grid overlay on the image.
Define the planes. Draw one or more rectangles on the grid to define the planes of the image. The planes should match the orientation of the objects in the image. For example, if you want to warp a building, draw a plane along each wall and roof. You can adjust the size and shape of the planes by dragging the corners or edges. You can also add or delete planes by using the plus and minus icons on the options bar.
Warp the perspective. Switch to the warp mode by clicking the Warp button on the options bar. You can now move and rotate the control points on the grid to change the perspective of the image. You can also use the Shift and Alt keys to constrain or scale the movement. You can see a preview of the result as you warp the image.
Apply the changes. When you are satisfied with the result, click the checkmark icon on the options bar. This applies the perspective warp. You can also cancel the changes by clicking the cross icon.
What are some examples of perspective warping?
You can use perspective warping for various purposes, such as:
Correcting perspective distortion. You can use perspective warping to straighten bent lines. For example, the edges of buildings or roads may look distorted due to the camera angle or lens. This can make your architectural or landscape photos look more accurate and realistic.
Aligning objects in the frame. You can use perspective warping to make the objects in your image look aligned or evenly spaced. For example, you can line up a series of products for a catalog or a website. You can also make the elements in a collage look harmonious.
Changing the viewpoint. You can use perspective warping to change the clear viewpoint of the image. For example, you can turn a telephoto shot into a wide-angle shot. Or you can turn a wide-angle shot into a telephoto shot. You can also exaggerate the perspective of the image to create a dramatic or artistic effect.
Creating realistic composites. You can use perspective warping to match the perspective of different images. You want to combine them into a single image. For example, you can insert an object into a scene and make it look like it belongs there. Or you can swap the background of an image with another one.
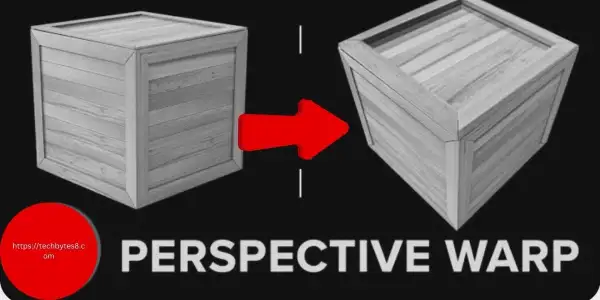
Here are some examples of perspective warping applied to different images:
![Perspective warping examples]
What are some alternatives to perspective warping?
A: Some alternatives to perspective warping are:
Perspective transform. This is a technique that allows you to change the perspective of an image or a part of it by using four corner points. You can drag the corner points to adjust the perspective of the image. This technique is simpler and faster than perspective warping. But, it gives you less control and precision over the shape and position of the image.
Lens correction. This is a technique that allows you to correct lens distortions. For example, you can fix barrel or pincushion distortion. These affect the perspective of the image. You can use a filter or a tool to automatically detect and correct the lens distortion. The image’s metadata forms the basis for this. Or, you can manually adjust the distortion parameters. This technique is useful for fixing minor or uniform distortions. But, it may not work well for complex or irregular distortions.
Free transform. This is a technique that allows you to resize, rotate, skew, or distort an image or a part of it by using a bounding box. You can drag the handles or the center point of the bounding box to transform the image. This technique is versatile and easy to use. But, it may not preserve the perspective or the proportions of the image.
What is perspective distortion?
Perspective distortion is a phenomenon in photography and cinematography. It’s when the relative size and position of objects in an image differ from how they appear in reality. The angle of view of the camera and the distance between the camera and the subject cause it. You can use perspective distortion to create different effects or illusions in an image. For example, it can make objects appear larger, smaller, closer, or farther than they actually are.
Some examples of perspective distortion are:
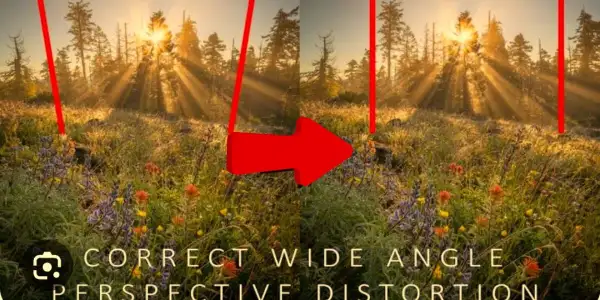
Extension or wide-angle distortion occurs when the camera is close to the subject. It happens when the camera uses a wide-angle lens. Objects near the center of the image appear larger than normal. Objects near the edges appear smaller and farther away. This can create a sense of depth and exaggerate the size of the subject.
Compression or telephoto distortion occurs when the camera is far from the subject. It happens when the camera uses a telephoto lens. Objects in the image appear similar in size, regardless of their distance from the camera. This can create a sense of flatness and reduce the sense of depth.
Perspective distortion is not a flaw of the lens, but a result of the geometry of light rays. You can control it by changing the distance or focal length of the camera. You can also use software to correct or enhance the distortion.
What is the difference between perspective distortion and lens distortion?
Perspective distortion and lens distortion are two different types of distortion. They can affect the appearance of an image. Here is a brief summary of the difference between them:
The position of the camera relative to the subject causes perspective distortion. The angle of view of the lens also contributes. It affects the relative size and shape of objects in the image. This makes them appear larger or smaller, closer or farther, or stretched or flattened. It all depends on the distance and the focal length of the lens. Perspective distortion is not a flaw of the lens, but a result of the geometry of light rays. You can control it by changing the distance or the focal length of the camera. Or, you can use software to correct or enhance the distortion.
The optical imperfection of the lens causes lens distortion. It’s also caused by the way it bends light as it passes through the lens elements. It affects the straightness of lines in the image. This makes them appear curved or deformed. The appearance depends on the shape and quality of the lens. Lens distortion is a flaw of the lens. We can classify it into three types: barrel, pincushion, and mustache distortion. Using software to adjust the distortion parameters of the lens can correct it.
Frequently Asked Questions ?
What is the difference between perspective warping and perspective cropping?
Perspective warping is a technique that allows you to change the perspective of an image or a part of it. You use a grid of control points. Perspective cropping is a technique. It allows you to crop an image along a perspective plane. You use a perspective grid for this. Both techniques can correct perspective distortion. Perspective warping gives you more control and flexibility over the shape and position of the image.
What are some tips for using perspective warping effectively?
Some tips for using perspective warping effectively are:
Use a high-resolution image to avoid losing quality or detail when warping the image.
To isolate the part of the image you want to warp, use a separate layer or a mask. This way, you can preserve the original image and undo the changes if needed.
Use many planes to define the perspective of complex or irregular objects. Buildings with curved or angled walls are an example.
Use the Shift and Alt keys to constrain or scale the movement of the control points. Avoid making extreme or unrealistic adjustments that may distort the image too much.
Use the preview option to check the result before applying the changes. Make fine adjustments if necessary.
What is perspective warping used for?
Perspective warping is used for changing the perspective of an image or an object in an image, as if it was viewed from a different angle or position. It can be useful for various applications, such as:
Correcting distortion or alignment of images, especially architectural or panoramic ones.
Resizing or manipulating images without affecting their shape or proportions.
Matching perspective in a composite image, where multiple images are combined into one.
Creating artistic or realistic effects, such as turning a telephoto shot into a wide-angle shot.
