What is Pixlr E ?
Pixlr E is an advanced online photo editor. It offers a range of features and tools for professionals and enthusiasts alike. It allows you to edit your photos in various ways. You can apply filters, effects, adjustments, and more. You can also customize your workspace. Collaborate with others and access your photos from any device.

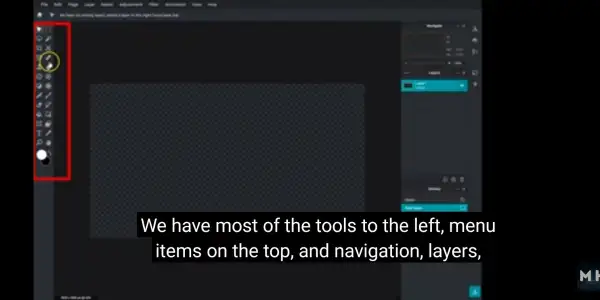
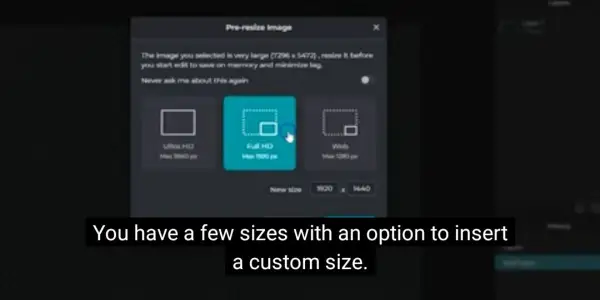
To start editing with Pixlr E, visit the Pixlr E website. Click on “Open Image” to upload your desired photo from your computer. Or, select “Create New” to start with a blank canvas. You can also import images from a URL or your social media accounts by clicking on the respective icons. Then, use the toolbar on the left to access the essential tools. Use the panels on the right to control the layers, history, and properties of your image. You can also navigate to the “Adjustment” and “Filter” tabs to make basic and advanced changes to your photo.
What are the benefits of using pixlr e?

Pixlr E is a free online photo editor: This means that you do not have to pay any money to use pixlr e. You can enjoy all the features and tools that Pixlr E offers. There are no subscription or registration fees. You can also use pixlr e as much as you want, without any limitations or restrictions.
Pixlr E is fast and easy to use: This means that you do not have to wait for a long time to load or edit your photos. Pixlr e works smoothly and efficiently on any browser and device. You can also use pixlr e without any prior experience or knowledge of photo editing. Pixlr e has a user-friendly and intuitive interface. It guides you through the editing process.
Pixlr E gives you professional results. Using Pixlr E, you can achieve high-quality, stunning effects with your photos. It offers a range of features and tools. They allow you to edit your photos in various ways. You can apply filters, effects, adjustments, and more. You can also customize your workspace. You can collaborate with others and access your photos from any device.
You can save your photos in high quality. This means you can preserve the original resolution and quality of your photos when you save them using Pixlr E. You can also choose from different file formats. For example, JPEG, PNG, or WebP. Adjust the quality settings according to your preference. You can also export templates of your images, and then reuse and change them later.
You can access your photos from anywhere, on any device. This means you can edit your photos anytime and anywhere. You just need an internet connection and a browser. You can also import images from a URL or your social media accounts. Click on the respective icons on the Pixlr E website. You can import from Facebook, Instagram, or Google Photos. You can create a free pixlr account. You can also sync your photos across different devices using it.
You can share your photos with others in real-time. This means you can collaborate and communicate with other users on your photos using Pixlr E. You can invite others to join your editing session by sending them a link. You can also chat with them using the built-in messenger. You can also see the changes that others make to your photos in real-time. You can give feedback and suggestions. You can also share your photos with your friends and family on social media platforms. These include Facebook, Twitter, and Pinterest. Click on the share button on the pixlr e website.
What are some of the features and tools that pixlr e offers?
Text Wrap. Use Text Warp to transform text in various ways. You can bend, twist, arch, or bulge text. You can also adjust the size, position, and orientation of the text on your image. To use this tool, select the Text tool from the toolbar. Type your text and click on the Warp icon in the properties panel. You can choose from different warp presets, or customize the warp settings manually. You can also apply different styles, colors, and effects to your text. For example, shadows, outlines, and gradients.
Color Replace Tool : enables you to replace the color of a specific region on your image. You can choose another color to replace it. You can use this tool to change the mood, tone, or theme of your image, or to create artistic effects. To use this tool, select the Color Replace tool from the toolbar. Then, click on the color you want to replace on your image. A color picker will appear, where you can select the new color you want to apply. You can also adjust the tolerance and edge hardness of the tool to refine the selection and the result.
Batch Edit allows you to edit many images at once. Use the same settings and adjustments for all images. You can use this feature to save time and ensure consistency across your images. To use this feature, click on the Batch Edit icon in the top right corner. Then, select the images you want to edit from your computer or cloud storage. You can then apply various adjustments, filters, and effects to your images. For example, you can crop, resize, rotate, enhance, and more. You can also rename, convert, or compress your images, and then download or share them as a zip file.
AI tools use artificial intelligence to perform complex edits on your photos. They also perform advanced edits. These tools can remove backgrounds, cut out objects, replace skies, and more. These tools can help you achieve professional-looking results with minimal effort and time. To use these tools, click on the AI Tools icon in the bottom right corner. Then, select the tool you want from the menu. You can then follow the instructions on the screen to apply the tool to your image. You can also fine-tune the result using the sliders and options provided.
Premium Templates, Fonts, and Elements are resources. You can use them to create stunning designs and collages with your photos. For example, you can make flyers, posters, cards, and more. These resources are only for Pixlr Premium subscribers. They are regularly updated with new and trendy content. To use these resources, click on the Template icon in the top left corner. Then, browse through the available categories and themes. You can then select the template you want to use, and customize it with your own photos, text, and elements. You can also access thousands of fonts and elements from the Text and Element tools in the toolbar.
Layers And Masks. In Pixlr E, users can work with many layers and masks. They can edit, reorder, blend, and lock them. Users can also create layer groups and adjust the opacity and visibility of each layer.
Selection tools. Pixlr E provides various tools for selecting and transforming parts of an image. The tools include the lasso, marquee, magic wand, and quick selection. Besides, Pixlr E offers crop, resize, rotate, flip, skew, distort, and perspective tools. Users can also refine their selections with feathering, smoothing, expanding, and contracting options.
Adjustment and filter tools. Pixlr e enables users to enhance and stylize their images with adjustment and filter tools. They can adjust brightness, contrast, hue, saturation, color balance, curves, levels, exposure, gradient map, invert, sharpen, blur, noise, and more. Users can also apply preset effects and overlays, or create their own custom filters.
Drawing and Text tool. Pixlr e supports drawing and text tools. These include the brush, pencil, eraser, clone stamp, healing, spot healing, dodge, burn, sponge, gradient, paint bucket, and text tools. Users can customize the size, shape, hardness, opacity, and color of the brushes. They can also choose from a variety of fonts, styles, and effects for the text.
How do I save my edited photo in pixlr e?
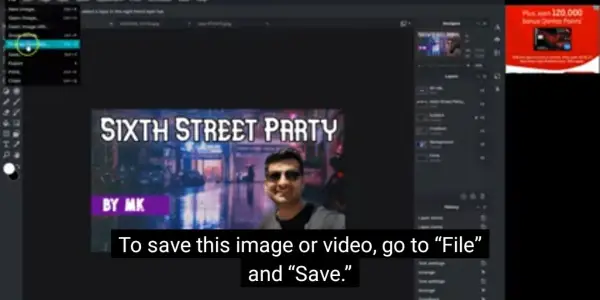
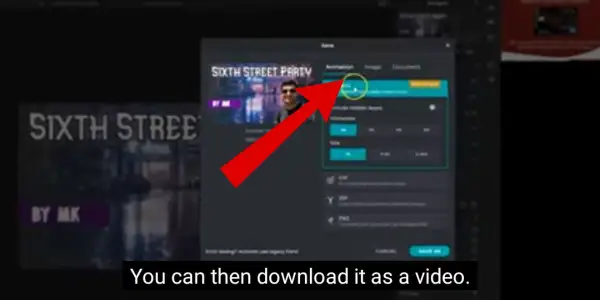
To save your edited photo in pixlr e, you need to follow these steps:
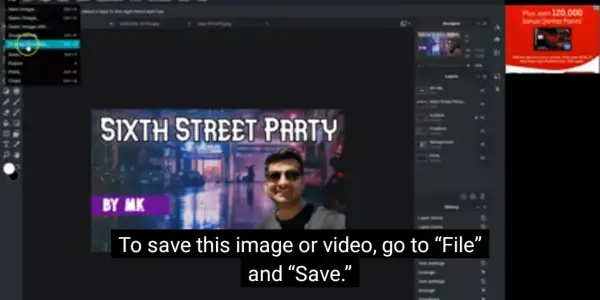
Click on the “File” menu in the top left corner of the interface, and select “Save” or “Export”.
Choose the desired file format (JPEG, PNG, or WebP) and adjust the quality settings.
Choose the destination folder for your photo and click “Save”.
What is the maximum file size I can upload to pixlr e?
According to the Pixlr E website, the maximum file size you can upload to pixlr e is 5 MB. This applies to JPG, PNG, GIF, BMP, and TIFF file formats. If your image is larger than 5 MB, you may need to resize it or compress it before uploading it to pixlr e.
How do I crop my image in pixlr e?
Cropping your image in Pixlr E is a simple process. It allows you to remove unwanted parts of your photo and focus on the most important elements. Here are the steps to crop your image in pixlr e:
Open your image in pixlr e by clicking on “Open Image” or “Create New” on the pixlr e website1.
Select the crop tool from the toolbar on the left. It looks like a square with a diagonal line through it.
Drag your mouse over the image to create a rectangular selection. You can adjust the size and position of the selection by dragging the handles on the corners and edges.
You can keep a specific aspect ratio, such as 16:9 or 1:1. Choose it from the “Constraint” dropdown menu on the top toolbar. You can also enter a custom ratio in the “Width” and “Height” fields.
When you are happy with your selection, double-click inside it. You can also click on the “Apply” button on the top toolbar. This will crop your image to the selected area.
Save your image by clicking on “File” and then “Save” or “Export” on the menu bar. You can choose the file format and quality settings for your image.
You can also watch these video tutorials for more guidance on how to crop your image in pixlr e.
How do I add text to my image in pixlr e?

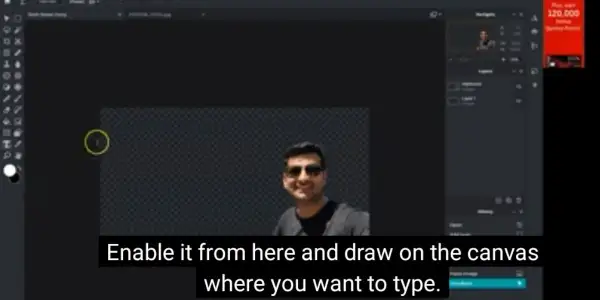
Adding text to your image in pixlr e is a fun and easy way to personalize your photos. Here are the steps to do it:
Open your image in pixlr e by clicking on “Open Image” or “Create New” on the pixlr e website.
Select the text tool from the toolbar on the left. It looks like a capital letter “A”.
Click on the area of your image where you want to add text. A text box will appear, and a “Text Properties” window will open.
Type your desired text in the text box, and adjust the font, size, color, and other styling options as needed.
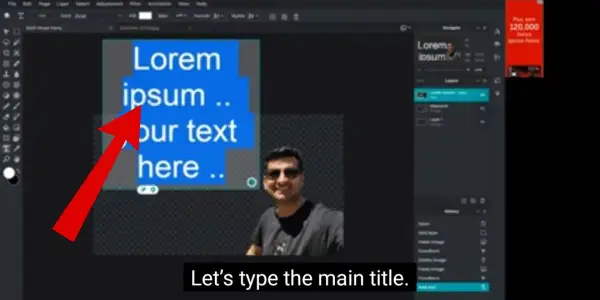
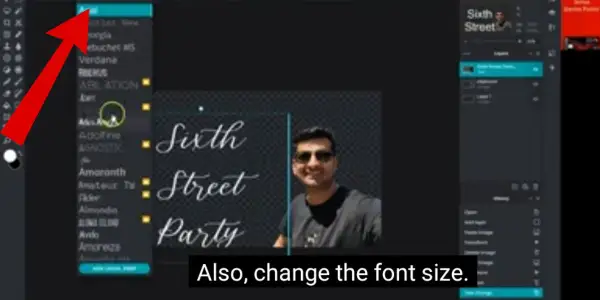
Select the move tool from the toolbar on the left. It looks like a cross-arrow. Click and drag the text to reposition it on the image. To resize or rotate the text, use the transformation handles. They appear around the text box when it’s selected.
Save your image by clicking on “File” and then “Save” or “Export” on the menu bar. You can choose the file format and quality settings for your image.
How do I add a filter to my image in pixlr e?
Adding a filter to your image in pixlr e is a great way to enhance the look and feel of your photo. Here are the steps to do it:
Open your image in pixlr e by clicking on “Open Image” or “Create New” on the pixlr e website1.
Navigate to the “Filter” tab, located in the bottom right corner of the interface. You will see a list of categories, such as “Adjustment”, “Blur”, “Sharpen”, and “Creative”.
Browse through the various filters and effects available. For example, blurring, sharpening, and artistic effects. Click on a filter or effect to preview it on your image, and use the sliders to adjust the intensity. Click “Apply” when you’re satisfied with the result.
Save your image by clicking on “File” and then “Save” or “Export” on the menu bar. You can choose the file format and quality settings for your image.
You can also watch these video tutorials23 for more guidance on how to add a filter to your image in pixlr e.
What is the maximum number of filters allowed in an image in pixlr e?
there is no specific limit on the number of filters you can apply to an image in pixlr e. But, applying too many filters may affect the quality and performance of your image. It is advisable to use filters sparingly and selectively. Save your image frequently. You can also use the history panel to undo or redo any changes you make to your image. I hope this helps you.
What is the difference between pixlr e and pixlr x?
Pixlr E and Pixlr X are both online photo editors, but they have different features and tools. Pixlr E is more advanced and suitable for professionals and enthusiasts. Pixlr X is more basic and easy to use for beginners and casual users. Here are some of the main differences between them:
Pixlr E has more image transformation and adjustment options than Pixlr X. It also offers more filter and layer controls.
Pixlr E supports more file formats, such as SVG and RAW, and allows you to export your images as templates.
Pixlr E has more graphic design tools, such as text warp, color replace, batch edit, and AI tools.
Pixlr E offers more customization options for your workspace. These include guides, pixel selection, and accent colors.
You can learn more about the differences between Pixlr E and Pixlr X by visiting these websites. You can also try both editors for yourself and see which one suits your needs better.
What is the pricing of pixlr e?
Pixlr E is a free online photo editor. It offers a range of features and tools for professionals and enthusiasts alike. You can upgrade to a Plus or Premium subscription plan to access more advanced features. These include AI tools, premium templates, fonts, and elements. Here are the pricing details for each plan:
Plus: This plan costs $1.99 per month or $19.99 per year. It gives you ad-free access, unlimited saves, and 80 monthly AI credits.
Premium: This plan costs $7.99 per month or $59.88 per year. It gives you full access to all the premium features across all platforms. This includes Pixlr X and Pixlr E, mobile apps, and AI tools. It also gives you 1000 monthly AI credits. You also get private mode for AI generations. Plus, a big library of fonts, templates, elements, animations, and more.
Team: This plan costs $12.99 per month or $99.99 per year. It gives you all the benefits of the Premium plan. Plus, it allows you to manage your team members and collaborate. It starts with five premium seats and 1000 monthly AI credits per seat.
You can also purchase additional AI credits, gift cards, or enterprise solutions from Pixlr. You can learn more about the pricing and features of Pixlr E by visiting these websites. I hope this helps you.
