Layer Mask In image Editing
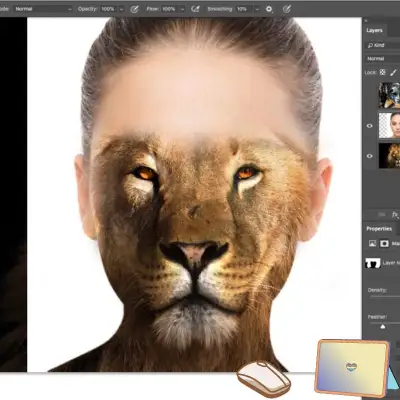
Layer Mask is a powerful feature in image editing. It allows you to selectively hide or reveal parts of a layer. It doesn’t permanently delete them. Layer masks are useful for creating image composites and modifying background colors.
They can also remove or cut out objects and apply adjustments to specific areas of an image. In this article, we will explain what layer masks are, how they work, and how to use them .

What is a layer mask?
In Photoshop, you attach a grayscale image called a layer mask to a layer. The layer mask controls the visibility of the layer, based on the brightness values of the mask. The white areas on the mask are fully visible. The black areas are fully hidden. The gray areas are partially visible. You can create and edit a layer mask using any of the Photoshop tools. These include the Brush, Gradient, Eraser, and Selection tools. You can also use vector shapes or paths to create a vector mask. It’s like a layer mask but uses math to create crisp edges.

How to add a layer mask to a layer?

To add a layer mask to a layer, follow these steps:
- Select the layer or group that you want to mask in the Layers panel.
- Click the Add Layer Mask button at the bottom of the Layers panel. This will create a white layer mask that reveals the entire layer.
- To create a black layer mask that hides the entire layer, hold down the Alt (Windows) or Option (Mac) key. Then, click the Add Layer Mask button.
- To create a layer mask from a selection, use any of the Selection tools to make a selection on the layer. Then, click the Add Layer Mask button. This will create a white layer mask that reveals the selected area and hides the rest.Selection Tools
How to edit a layer mask?
To edit a layer mask, follow these steps:
- Select the layer that has the layer mask in the Layers panel.
- Click the layer mask thumbnail to activate it. The white border around the thumbnail will say that you have selected the layer mask.
- Use any of the Photoshop tools to paint on the layer mask with black, white, or gray. Black will hide the layer, white will reveal it, and gray will partially show it. You can also use the Properties panel to adjust the density and feather of the layer mask.
- To invert the layer mask, press Ctrl+I (Windows) or Command+I (Mac) on your keyboard. This will swap the black and white areas on the mask, reversing the visibility of the layer.
- To disable or enable the layer mask, hold down the Shift key and click the layer mask thumbnail. This will temporarily hide or show the layer mask, allowing you to see the original layer.
How to use layer masks for photo editing?

Layer masks are very useful for photo editing. They let you adjust or add effects to specific parts of an image without affecting the rest. For example, you can use layer masks to:
- Change the background color of an image. Use a layer mask to isolate the foreground object from the background. Then, use an change layer, such as Hue/Saturation, to change the color of the background.
- Remove or cut out an object from an image. You can use a layer mask to hide the unwanted object from the layer. Then, use the Clone Stamp tool or the Healing Brush tool to fill in the empty area with the surrounding pixels.
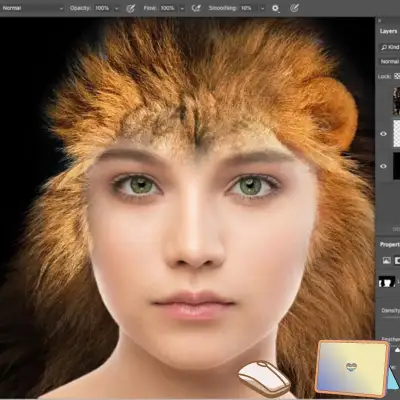
- Blend two images together. You can use a layer mask to create a smooth transition between two images. For example, you can blend a sky and a landscape by using a gradient or a soft brush on the mask.
- Apply selective sharpening or blurring to an image. You can use a layer mask to apply a Smart Sharpen or a Gaussian Blur filter to only certain areas of an image. For example, apply it to the eyes or the background using a selection or a brush on the mask.

What is the difference between a layer mask and an alpha channel?
A layer mask and an alpha channel control the transparency of an image or layer in Photoshop. But, there are some differences between them:
- The layer mask attaches to a specific layer and only affects that layer. The alpha channel exists independently of any layer and you can apply it to any layer or the entire image.
- You can edit or remove a layer mask at any time without affecting the original image. An alpha channel is a permanent part of the image file and cannot be undone unless you have a backup copy.
- A layer mask can only have one per layer, while an image can have up to 32 alpha channels. You can use many alpha channels to store different selections or masks for later use.
- A layer mask is more flexible and easier to use, while an alpha channel is more precise and scalable. You can use any Photoshop tool to create or edit a layer mask. An alpha channel requires more advanced techniques such as vector shapes or paths.
You can learn more about layer masks and alpha channels from these sources:
- Difference between Alpha Channels and Layer Masks
- Use alpha channels, masks, and mattes in After Effects
- Corel Painter Help | Layer masking
- What Are Alpha Channels In Photoshop And How To Use Them
- Save selections and alpha channel masks in Photoshop
What is the difference between a layer mask and a clipping mask?
A layer mask and a clipping mask are both ways of controlling the visibility of a layer in Photoshop. But, they have some key differences.
- A layer mask uses a grayscale image to hide or reveal parts of a layer based on the brightness values of the mask. A clipping mask uses the content and transparency of another layer. It defines the visible area of the layer above it.
- The user attaches a layer mask to a single layer, and it only affects that layer. You can apply a clipping mask to many layers and it will affect all the layers below it.
- You can edit or remove a layer mask at any time without affecting the original layer. The clipping mask permanently modifies the layer it is applied to.
- A layer mask can only have one per layer, while an image can have many clipping masks. You can use different shapes or paths to create different clipping masks for the same layer.
You can learn more about layer masks and clipping masks from these sources:
- The Difference Between Layer Masks & Clipping Masks in Photoshop
- Masking in Photoshop: Difference between Layer Masks and Clipping Masks
- How to Create Clipping Masks in Photoshop: A Beginner’s Guide

Frequently Asked Questions?
What is the difference between layer masks and vector masks?
Layer masks use grayscale images to control the visibility of the layer. Vector masks use vector shapes or paths to create crisp edges. Layer masks are more flexible and easier to edit. Vector masks are more precise and scalable.
What is the difference between layer masks and the Eraser tool?
Layer masks are non-destructive. They do not permanently delete any pixels from the layer. You can always edit or remove the layer mask without losing any information. The Eraser tool is destructive. It permanently erases pixels from the layer. You cannot undo or restore the erased pixels unless you have a backup copy of the layer.
How can I copy or move a layer mask from one layer to another?
To copy a layer mask, hold down the Alt key (Windows) or the Option key (Mac). Then drag the layer mask thumbnail from one layer to another in the Layers panel. To move a layer mask, drag the layer mask thumbnail from one layer to another without holding any key.
How can I link or unlink a layer mask to a layer?
To link a layer mask to a layer, click the link icon between the layer thumbnail and the layer mask thumbnail in the Layers panel. This will ensure that the layer and the layer mask move together when you use the Move tool. To unlink a layer mask from a layer, click the link icon again. This will allow you to move the layer and the layer mask independently.
